How to record and upload source video for a high-quality Voxforce AI
avatar — framing, lighting, audio, consent, and quality checks for
customers and partners.
Section 1
Purpose
To create a high-quality AI avatar, the uploaded video should clearly
capture the person’s face, voice, expressions, and speaking style. A
clean recording helps generate a more realistic, professional, and
human-like avatar.
Section 2
Video duration
2–5 min
Recommended length
90 sec
Minimum
The person should speak continuously and naturally during the recording.
Recording flow (during capture)
01Speak freely for 30 seconds
02Then stay silent and still for 30 seconds
Use this in-app flow when prompted; overall upload should still meet the
recommended duration above.
Section 3
Camera setup
Required
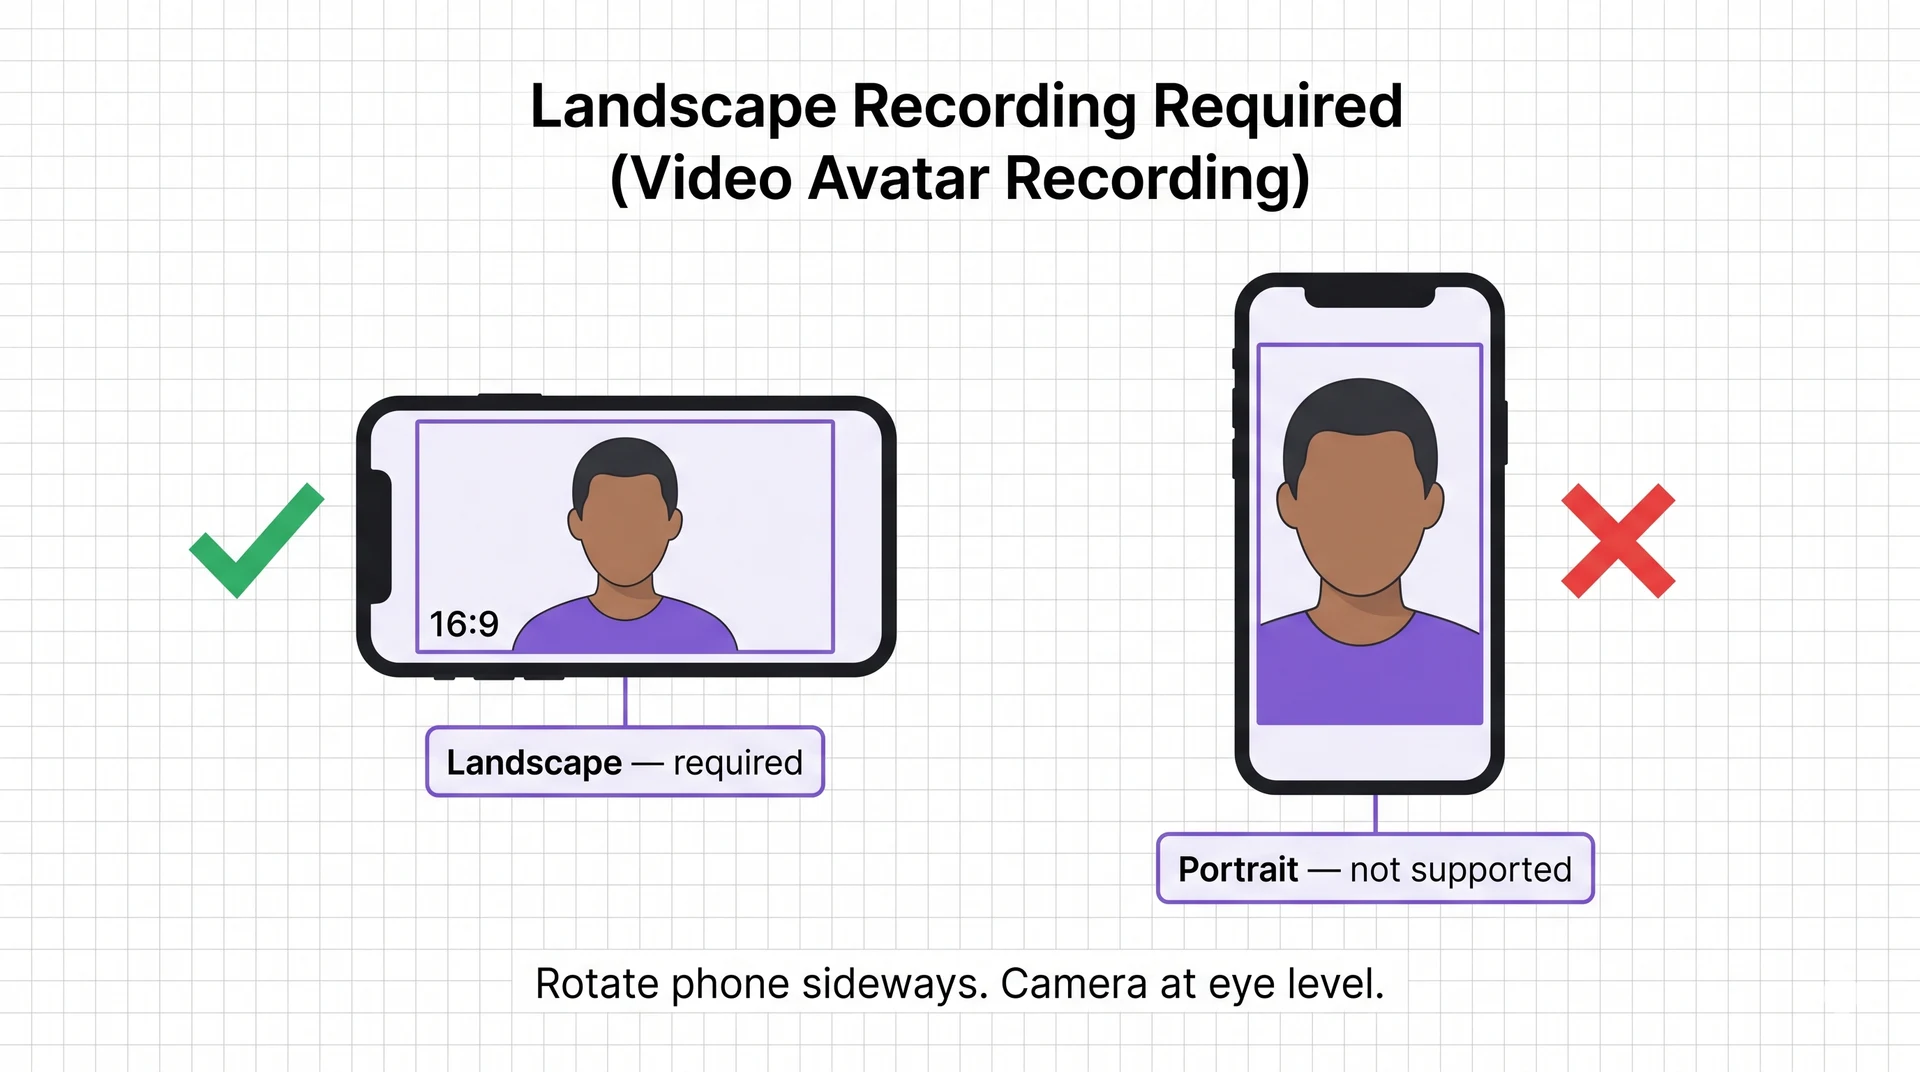
Record in landscape (horizontal) mode only — rotate your
phone sideways; portrait/vertical video is not supported.
Use a 16:9 frame; head and shoulders centered in the wide
shot.
Camera at eye level.
Face clearly visible; look directly into the camera.
Head and shoulders in frame — do not crop forehead, chin, or
shoulders.
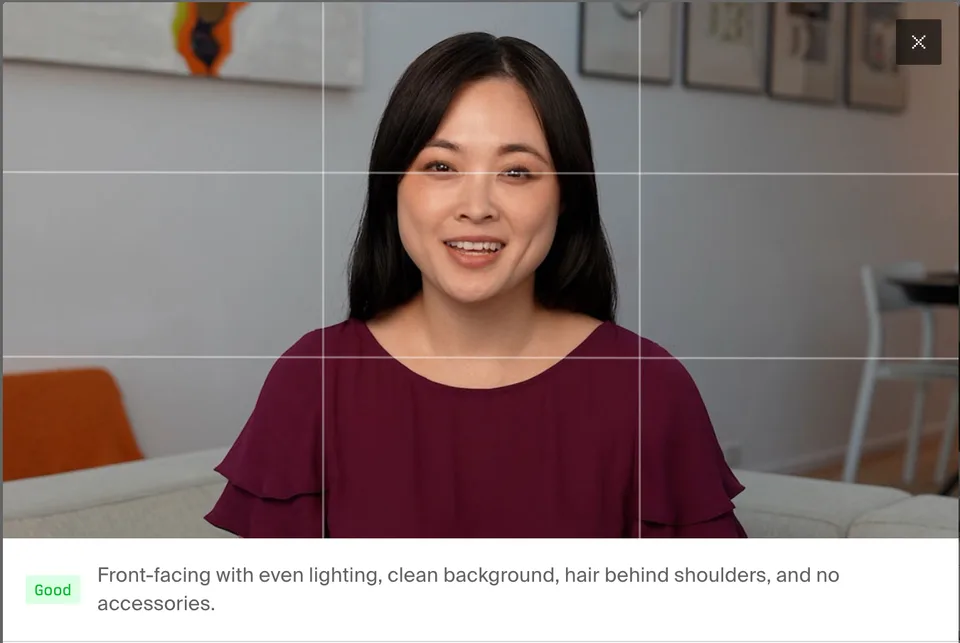
Example framing
Good and poor framing before you record.
Good
Front-facing with even lighting, clean background, hair behind
shoulders, and no accessories.
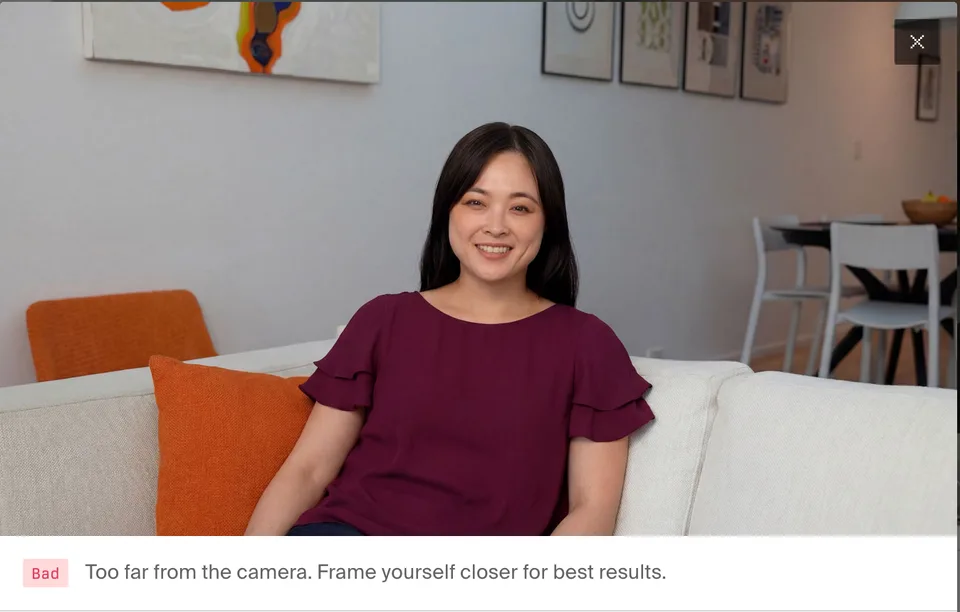
Bad
Too far from the camera. Frame yourself closer for best results.
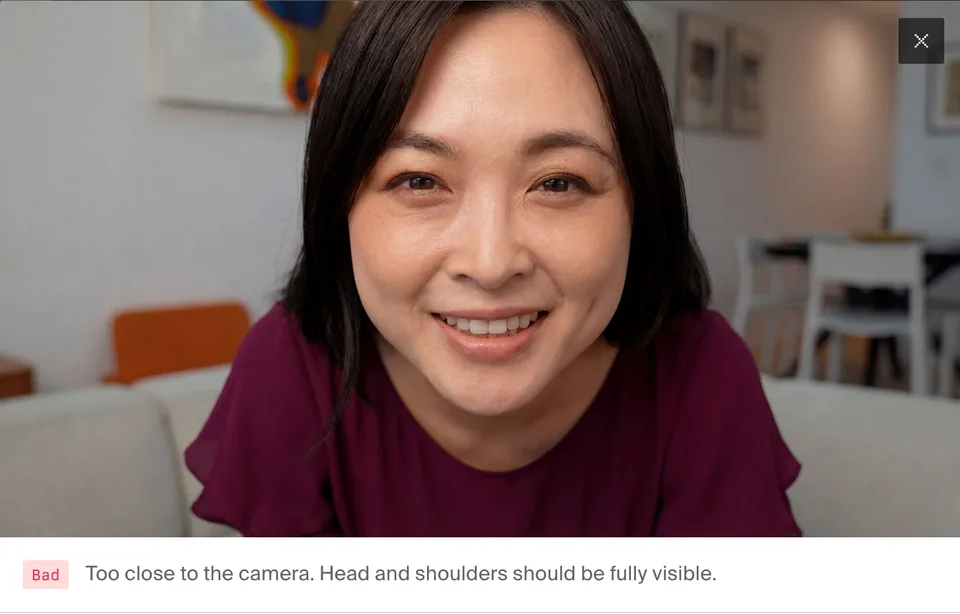
Bad
Too close to the camera. Head and shoulders should be fully visible.
Recommended framing
Head and upper chest visible; leave space above the head.
Person centered; avoid extreme close-ups.
Section 4
Lighting
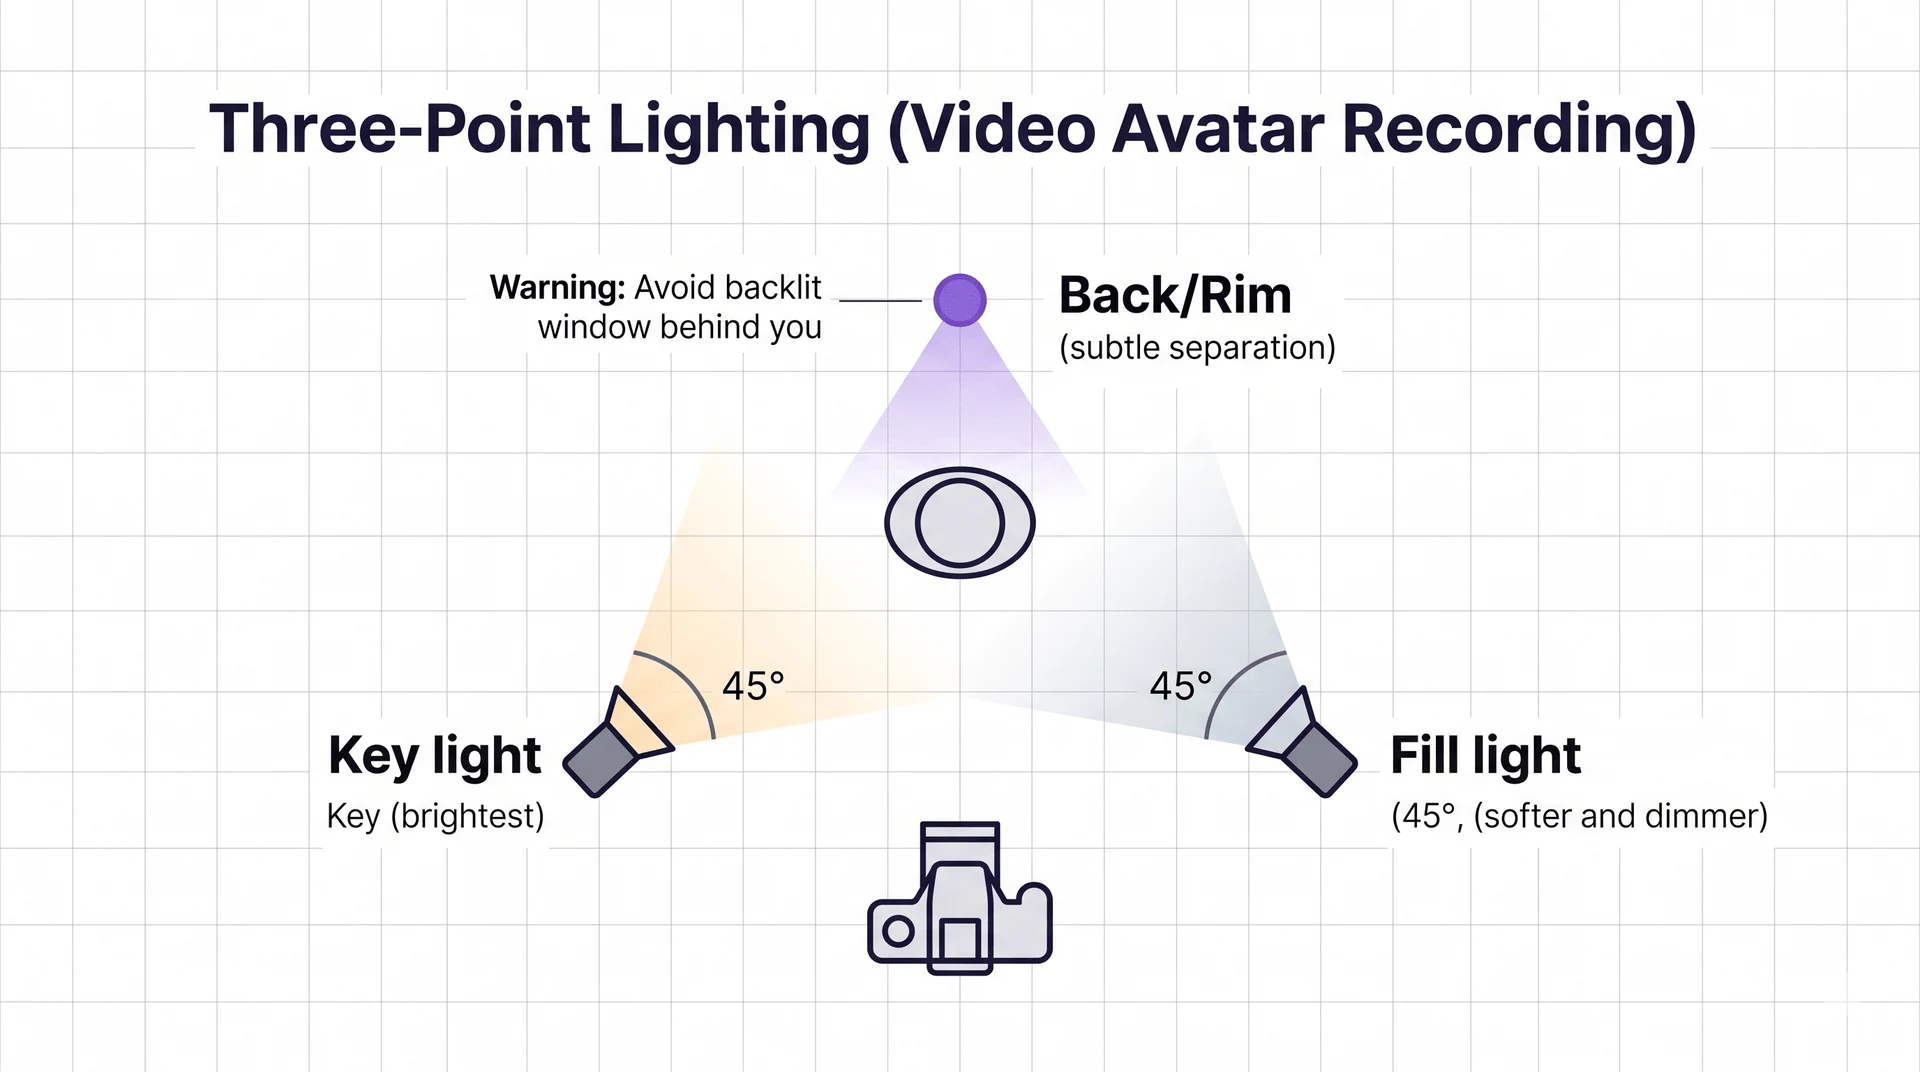
Good lighting keeps your face clear and dimensional on a landscape recording. The standard approach is three-point lighting — three sources that work together so the camera sees an even, natural face.
1. Key light
The main source — brightest, placed front-left or front-right at roughly 45° and slightly above eye level. A window, ring light,
or desk lamp with a diffuser works.
2. Fill light
A softer, dimmer source on the opposite side. It lifts
shadows the key creates (under cheek, nose). A second lamp, reflector,
or light wall can be your fill — it should never overpower the key.
3. Back / rim light
Optional but helpful — a small light behind you,
aimed at shoulders/hair to separate you from the background. Keep
it subtle; avoid shining into the lens.
No studio? Approximate it at your desk
Key — ring light or window in front of you, off to one
side, slightly above eye level.
Fill — a second lamp or white wall on the opposite side
to soften shadows.
Back — skip if the background is plain; otherwise a small
lamp behind you, out of frame.
Check the preview — both cheeks and forehead similarly
bright; no silhouette, no ceiling-only shadows.
Do
Key + fill on the face (three-point or a simple ring-light setup)
Soft, even light — no harsh shadows on cheeks or under eyes
Landscape frame with stable exposure throughout
Avoid
Backlight from windows
Dark rooms
Harsh overhead light
Colored or flickering lights
Section 5
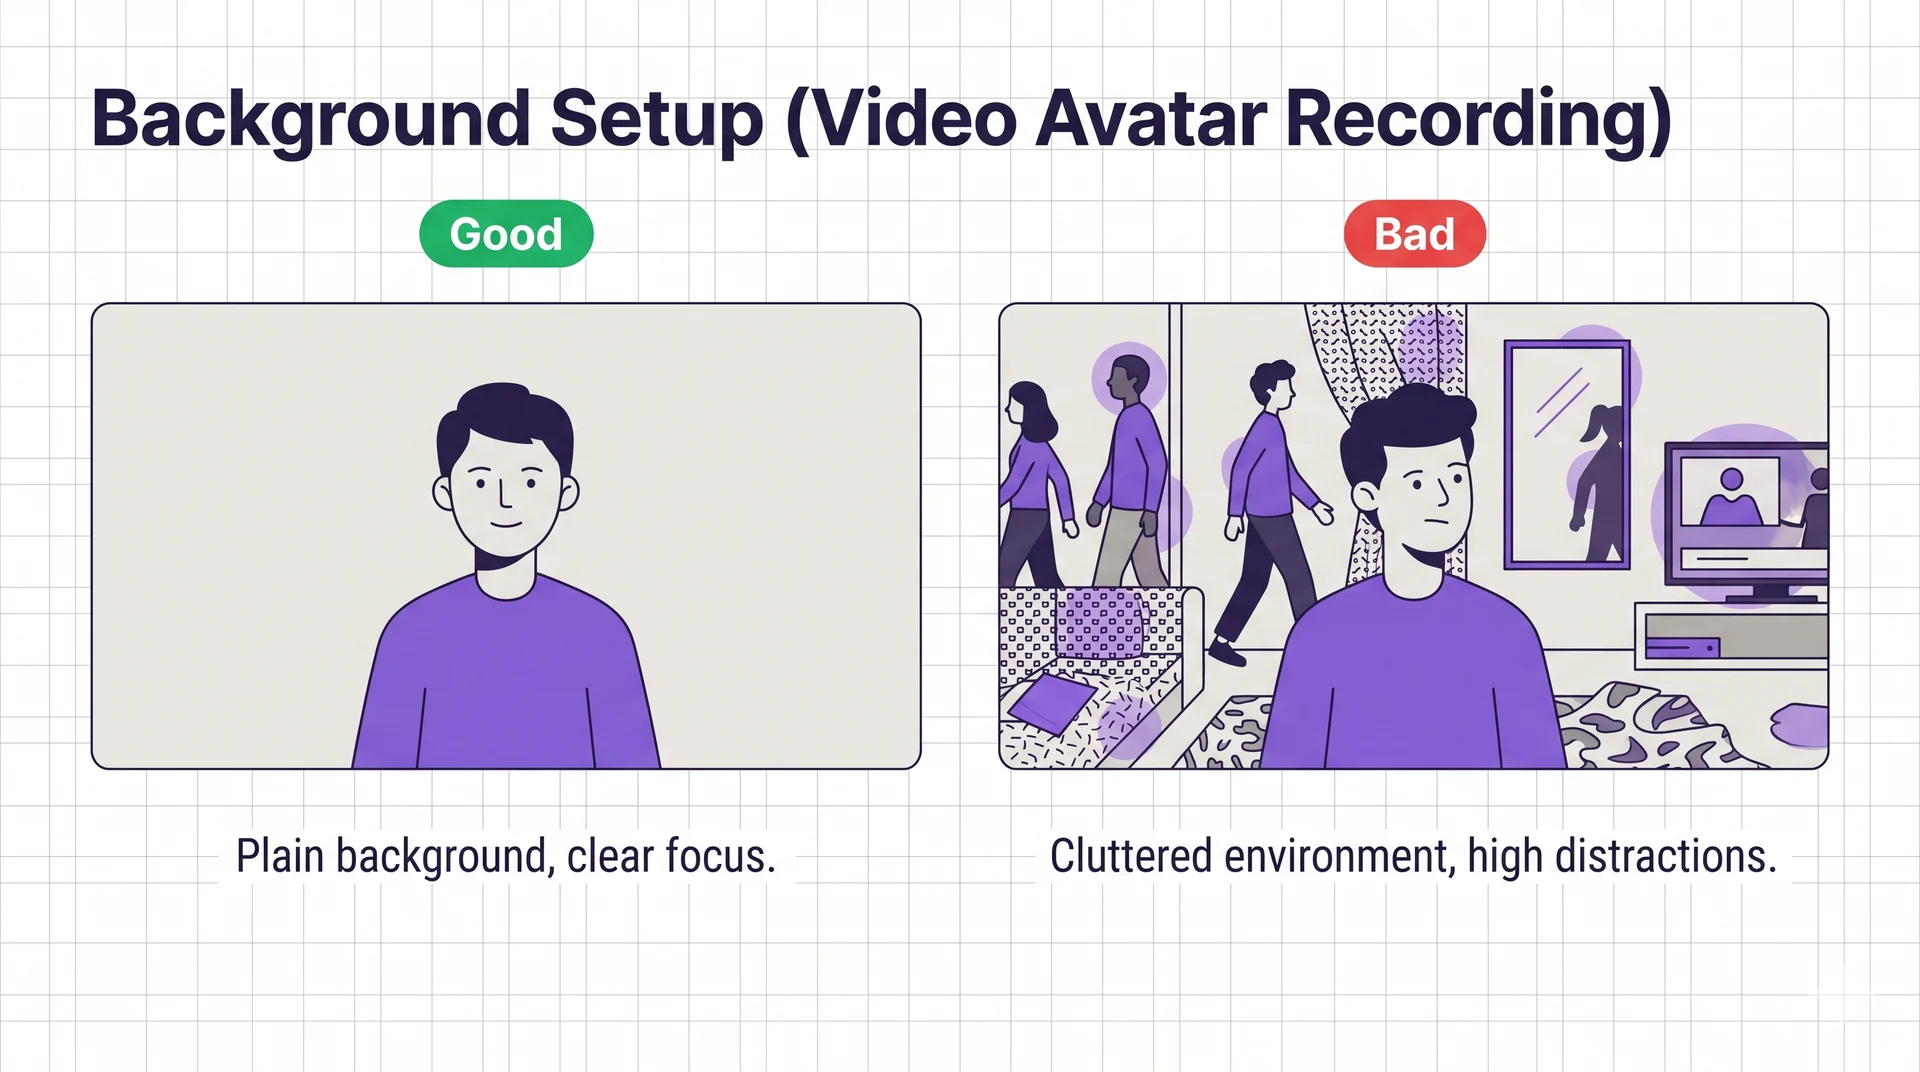
Background
Recommended
Plain wall or office setup
Clean, professional, light neutral background
Avoid
Busy or cluttered rooms
Moving people, strong patterns, mirrors
Screens playing video
Logos you do not own rights to
Section 6
Audio
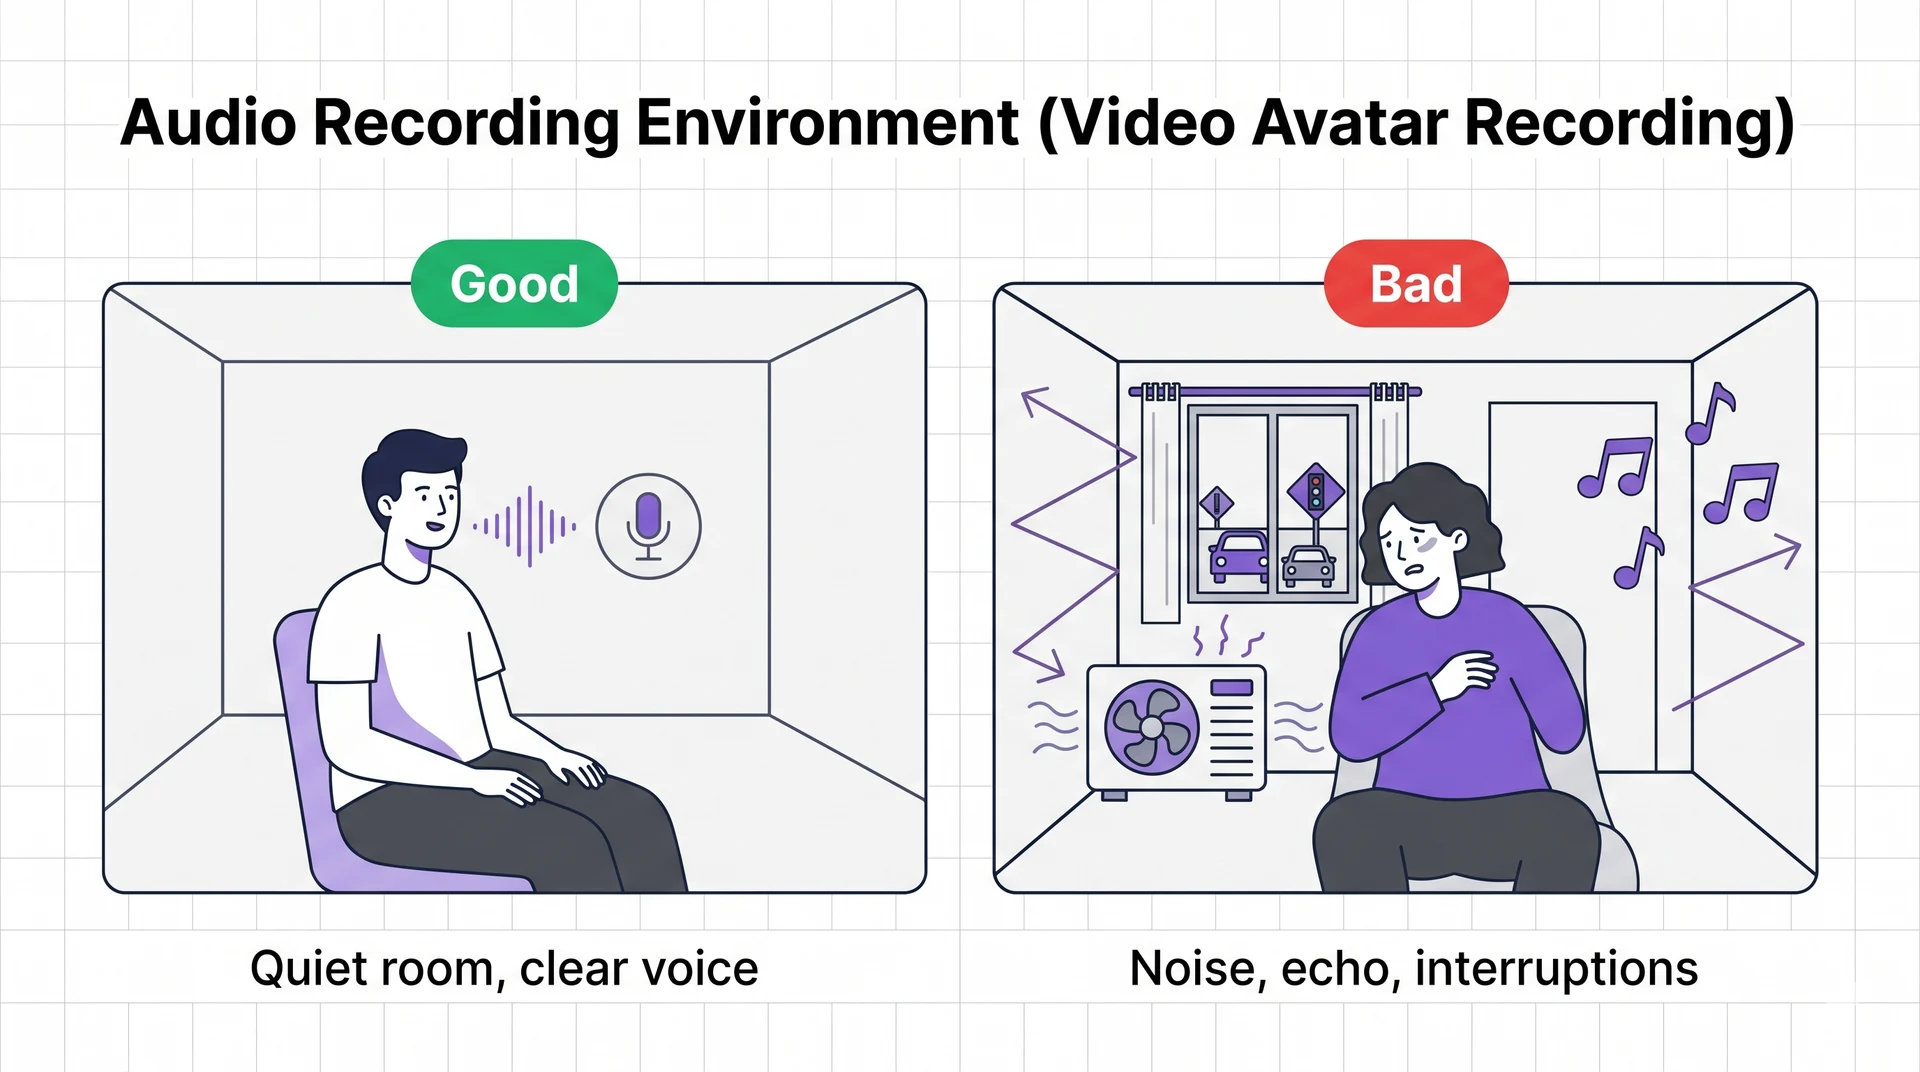
Audio quality is as important as video quality.
Do
Record in a quiet room
Use a good microphone if available
Keep the mic close but not visible if possible
Speak clearly, naturally, at consistent volume
Avoid
Background noise, echo, fan/AC noise
Music or traffic
Interruptions or speaking too fast
Section 7
Appearance
Recommended
Professional or brand-appropriate clothing
Solid colors; hair away from face
Avoid reflective glasses if possible
Natural facial expression
Avoid
Heavy patterns, stripes, shiny accessories
Face coverings, hats, sunglasses
Large distracting jewelry
Section 8
Speaking
Speak naturally, confidently, and clearly. Example lines:
“Hi, I’m here to help you understand our services and answer your
questions.”
“You can ask me about pricing, features, support, or how our product
works.”
Do
Normal speed; natural pauses
Friendly tone; slight expressions
Smile naturally; eye contact with camera
Avoid
Reading too fast; looking away
Long silent pauses; overacting
Whispering or shouting
Section 9
Body movement
Recommended
Sit or stand still; minimal natural head movement
Slight hand movement okay if visible
Stable posture
Avoid
Walking, excessive movement, leaving frame
Turning away; covering mouth; sudden gestures
Section 10
Technical requirements
File type: MP4
Resolution: 1080p minimum
Frame rate: 25fps or 30fps
Audio: clear voice, no background music
Optimize file size for upload
Avoid
Low resolution, blur, screen recording, heavy compression
Filters, beauty effects, watermarks, AI face filters
Section 11
Consent & rights
Before uploading, confirm:
You own the rights to the video
The person has given consent for an AI avatar
The avatar will not be used for impersonation, fraud, or misleading
communication
“I confirm that I have permission to use this video and authorize
Voxforce to create an AI avatar from it.”